Pages

Monday, 21 May 2012

May workshops in Scotland

I ran two workshops last weekend, and had a really good time working and sharing ideas with two very different groups of spinners.
On saturday it was all about Spinning in Control - producing the type of yarn you want that will be right for the project you have in mind. However the first task was to get the spinning wheel that one participant had brought along back in working order! As it was an Ashford traditional that was relatively straightforward, I had spare drive band, brake band and spring in my Spinning Wheel First Aid Kit, and a can of oil to hand!
Then we discussed how planning a yarn for a specific project starts with the choice of fibre, and the method of preparation , before starting to spin. We covered how you find out how thick your  finished yarn needs to be, and (assuming you're aiming to produce a plied yarn) how thick the singles need to be. After practicing measuring yarn thickness both during spinning and finished yarn, we went over the relationship between thickness and twist, how to measure twist angle, and appropriate amounts of twist for different uses. Then we went through the steps of relating thickness, chosen twist angle and the twist ratio of the spinning wheel to determine what length of yarn to produce per treadle. If that all seems very technical, and off-putting, the tables in my book 'Spinning a good yarn' allow you to look up the relevant measures for the yarn you want to produce, without having to do the maths!
After lunch and cake it was time to put it all into practice, first each person decided on the type of yarn she wanted to make before  carding some fleece, and then spinning and plying it. With a bit of practice to get the right rhythm of drafting and treadling, the planned yarn was produced.
I dont know about the 'students' but I was certainly tired that evening - maybe more to do with having been out to the Opera and late home on both Thursday and Friday nights. The Barber of Seville and Eugene Onegin - impossible to choose only one!!!

After a day of focusing on precision, Sunday's workshop Playing with Colour was a real contrast - and I've got some photos for you to see.
The workshop covered three different ways of mixing fibres of different colours and textures to create batts that can be used either for spinning or felting. I had spindles available for anyone who just couldn't wait to see how their blend would spin up, but the day was really all about preparation.
With drum carders, hand carders, combs and a giant bag of fibres of many kinds, we had lots to play with! And plenty of tea and cake to keep us going of course.

Colour blending
The first technique involved using fibres in the three primary colours, plus black and white, to create shades picked out from a photograph. here are some examples:
Mandy's autumn leaf blends

Noreen's mountain dawn blends
Gradient yarns
I had brought along an example of a Gradient - a yarn that shades smoothly from one colour to its opposite, created by blending fibre of the two colours in carefully calculated proportions. I used natural black and white fleeces to produce this:
My natural Gradient, knitted into a basket stitch scarf
Three people decided to create their own gradients in the same black and white fleeces, here is one set of batts:
However Linda decided to go for colour in her gradient. in the foreground of the first photo you can see her fibres all weighed out and ready to start carding and blending. This is what she produced:
The primary yellow and blue were a little harsh on their own so we decided to add a small amount of natural black and white Shetland wool equally across the gradient. The small curls of yellow and blue on top of the end batts are the 'pure' colours. I'm really looking forward to seeing this yarn spun up.

Art yarns
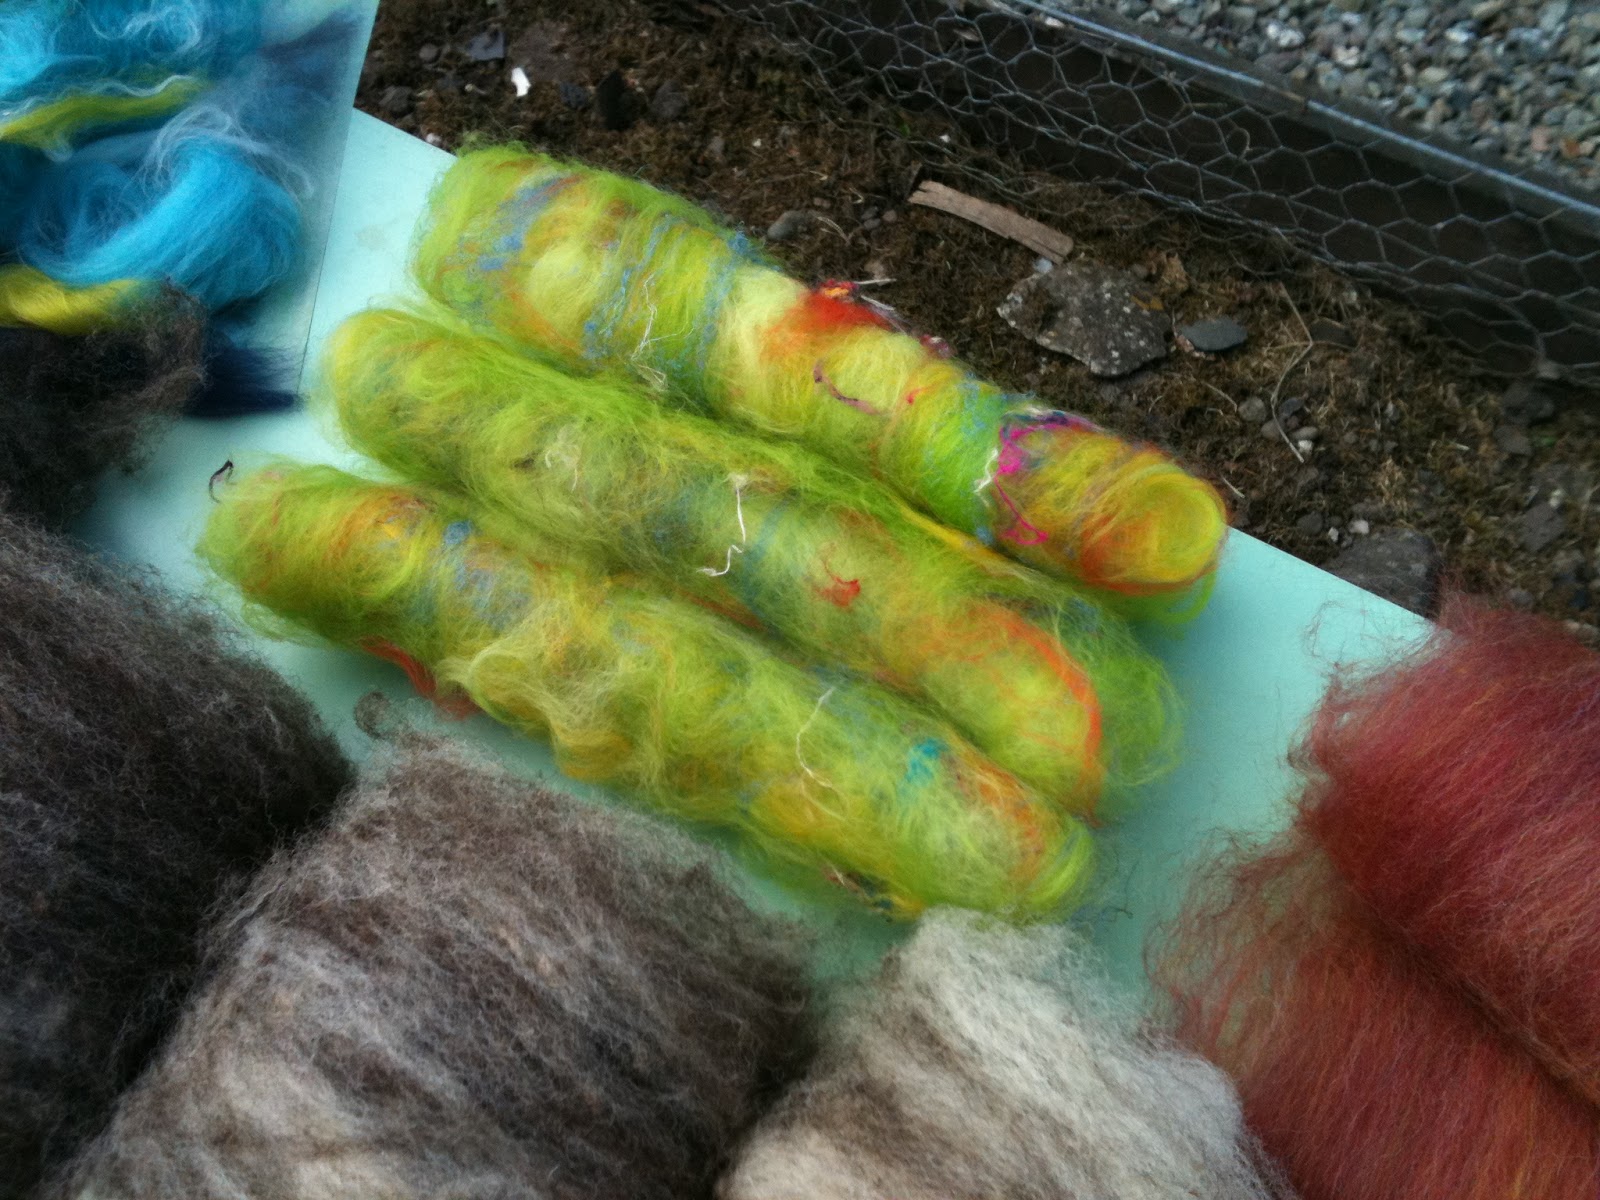
The third technique was again to take inspiration from an image, but this time to create a batt that combined the main colours and textural elements from the photograph, to produce art yarn. As well as more than a rainbow's worth of colored wool tops, I had brought along a big bag of fibres and yarns for adding texture - different kinds of silk, linen, angora, cut yarns, to name but a few. here are my examples:
and here's what was created on Sunday :
Aileen's spring meadow art batts
Linda's fabulous art yarn
Noreen's purple art batts with hand-dyed silk throwster's waste and recycled sari silk
mandy's misty woodland art batts
Fuelled by cake and a fab picnic lunch (thank you Aileen), and accompanied during the afternoon by fiddle music from the bigger hall next door (and more cake, thanks to the Over 60's Tea hosted by the Brownies!!) everyone accomplished much more than I expected in the time. Everyone did the techniques in a different order, but most managed to do all three during the workshop, which was a real achievement as the gradients and blends require repeated carding, someties as many as five times. It was a lot of work but a really fun colourful day and I'm looking forward to seeing the yarns that are spun from the boxes of carefully prepared batts that everyone took away with them.

Want to try these yourself?
I'll be repeating these workshops in the autumn, as well as a 'beginners weekend'. If you are interested, drop me an e-mail for  dates etc. I'm also planning a new 'menu' of workshops for next year., some really exciting ideas but I'm keeping them under wraps for now Right now, I'm off to pack my equipment for workshops in Miagliano (BI) next weekend, and then a short class in Venice the week after........then it's back to Perthshire for Fleece on the Hoof. See Workshops tab for details.

Friday, 20 April 2012

Big knitting

photo by Elena Costella in her Perth shop/studio
The picture says it all!!! 30mm diameter and 1.2m long (that's 4 feet long in old money), these giant needles are surprisingly easy to use, and the work grows really quickly.
The photo was taken at the launch of Big Knitting at Elena Costella's Yarn and Fibre Studio in Perth click here last saturday. Elena is the only Scottish stockist for the Big Knitting and a crowd of knitters had a really fun afternoon trying out 3 sizes of Big needles, Big crochet hooks and even a Big circular needle. Ingrid Wagner, founder of the Big Knitting, click here was a colourful bundle of energy and inspiration.
The Italian connection
The 'yarn' in the photo is recycled selvedge from weaving blankets. The sharp-eyed among you may recognise the colours of the Italian flag in the yarn in my hand. I spotted it immediately as the selvedge from the blankets woven in Biella last year to celebrate the 150th anniversary of the unification of Italy. I was in Biella teaching a spinning course in November and bought one of the blankets. It is lovely and soft, the wool is produced locally by small-scale shepherds and all the processing is carried out within 10km.
Now I'm waiting impatiently to receive more of the selvedge/yarn so I can knit a pair of cushion covers to match my blanket.... on my new giant needles


in the meantime I've gone for a traditional red tartan 'selvedge' for the toning cushion
Almost instant gratification - the piece on the photo above is only 15 stitches and about 7 rows so far - mostly knitted by colleagues when I took the needles in to work yesterday to show some of the girls!.It makes a change from socks on 2mm pins!!

I'm planning all sorts of recycling projects, using old clothes and curtains - maybe a headboard, with the work still on the needles..... a quick way to make a big dent in the stash too...

Sunday, 8 April 2012

Colourful months part 2 - March


some
Another month, another workshop with the Online Guild of Weavers, Spinners and Dyers, this time Medieval Dyeing with Deb Bamford. I've done a lot of natural dyeing over the last 30+ years, but never in a very systematic way, so I thought this workshop would be a good opportunity to get some tips for improvement and also try to be a bit more disciplined in recording my efforts.
We started several weeks before the workshop proper, by preparing copper and iron solutions to use as modifiers. I put rusty nails in one jar, and some copper wire in another, topped them up with half-and-half vinegar and water, put the lids on and left them in a sunny place.

The third modifier was ammonia - traditionally stale urine was used, but I decided that was taking it just a tad too far and bought a bottle of ammonia from the ironmonger!

The materials: I chose parts of two fleeces - a fine white crossbred fleece and some Shetland that I had already (rather unsucessfully) solar-dyed with an exhaust bath of Cutch waste to a pale beige. I also used some Blue-faced Leicester tops, silk hankies, degummed cocoons, broken silk tops and silk noil tops, cashmere/silk blend tops, a skein of lovely soft cashmere yarn (commercially spun) and  small skeins of handspun silk and wool yarns. Finally, I experimented with dyeing batts of drum-carded (washed) wool
 I prefer to dye fibre rather than yarn or fabric for several reasons: I'm a spinner and occasional weaver so I'm not particularly interested in dyeing commercially spun yarn or fabrics - although I do make some exceptions to this; if the results aren't good I havent wasted the effort of spinning/weaving; if the dye takes unevenly on yarn or fabric there's not a great deal you can do about it - on fibre the dye pretty much always takes unevenly but you can then choose whether to exploit that to get a subtle variegation in the yarn, or blend thoroughly before spinning to get more homogenous colours. And of course you can blend the fibre from two or more dyelots to improve the shade or get a more useful quantity.
So I was starting to deviate from the workshop instructions before really getting started as Deb had recommended using yarn or fabric - which certainly run less risk of felting. Also commercially prepared fibres, spun or un-spun, seem often to take up dye better - I guess that the commercial scouring methods leave the fibres more porous than even a thorough washing at home.

That brings us to the first stage of preparation. I had already washed the fleece pretty thoroughly using washing soda and hot water at least twice. The first set of instructions were about scouring - getting rid of any last traces of grease or dirt in the fibre. Using my late mothers jam pan (aluminium, but I was going to use alum mordant anyway), the batches of soaked fibre were gently heated and simmered with detergent:
The next stage was to mordant it. Mordanting helps the dye to attach to the fibre. Some mordants are very toxic but for this workshop we used alum, in small enough amounts that it should all have been absorbed on to the fibres. However it is important to always be really carefull!!

I kept the mordanted fibres wet, in large plastic boxes with lids, which is fine over a few days - any longer before dyeing and I would have dried them and then soaked them again before dyeing.

The first dyestuff was good old onion skins. because I've used this many times I thought I'd try it out on the pre-dyed Shetland wool. This dye is substantive, which means it doesn't need a mordant. I had been collecting the dry papery outer skins for a few weeks - they keep really well in a paper bag.
I used essentially the same method to extract  all the dyes: I put them in a pan and poured boiling water over them, then left them to soak overnight. the next day I boiled them for about an hour, and again left them to soak overnight. The onion skins were the only dye I didn't tie up in muslin, instead I strained them out of the dye liquor before I put the wet fibres in.

Again, roughly the same method for all the dyes - after removing the dyestuff and entering the wet fibres, I heated the dyebath very slowly to 80 degrees centigrade. This took about two hours. Then I kept it on  a very low heat, checking that it didn't go above 80, for an hour, before switching off the heat and leaving it to cool and steep for up to 24 hours.

The next stage was to take the fibre out and divide it into smaller batches to experiment with the different modifiers. I just split the onion-dyed fibre into two batches and rinsed one.

I added a few spoonfuls of the iron solution to the dye, until it changed colour, going much darker. Then I put the second batch of dyed wool back in and heated it gently for about 15 minutes (from cold). Then I rinsed and dried the fibre:
To keep track of all my samples I cut out tags from a plastic carton, and numbered them in waterproof marker pen. That way I could tie them on to the samples as soon as they came out of the dyebath, without them being spoiled by getting wet.

The next dyestuff was Weld. I followed the same extracting and dyeing methods, using wool that had been pre-mordanted with alum and cream of tartar. I then divided the wool into six batches and the dye liquor into three. These were modified as follows:
the first wool sample #3: no modifier
I added a couple of spoonfuls of ammonia to the first dye batch and put in one wool sample #4. heated gently for 10 minutes then rinsed and dried
I added a few spoonfulls of copper solution to the second dye batch, put in two wool samples and heated gently for 10 minutes then took out one #5 and rinsed and dried. added a couple of spoonfuls of ammonia, heated gently for 10 minutes then rinsed and dried the other sample #6
I did the same thing with the last dye sample but using iron solution instead of copper, giving me samples #7 (iron) and #8 (iron + ammonia)
You can see the dramatic effect of ammonia on the samples on the right. The water here in Perthshire may be quite acidic, the alkali really brings out the colour. Copper had less effect than expected - perhaps the solution wasn't very strong, but iron darkened and 'saddened' the colour.

Next up was Dyers Broom, using the same methods as for Weld, and with very similar results:
The samples without ammonia are all a bit disappointing so I will keep a tiny amount of each as a record and then put them all in a dilute solution of ammonia to bring out the yellows. Actually yellow is a colour I rarely use so once I have spun them I may well over-dye them with indigo to try for some greens - it will be interesting to see if the ammonia has an effect on that.

So with the yellow/greens out of the way it was time to move on to (for me) the more interesting dyestuffs: brazilwood and madder.  However I wanted to dye more fibre in the 'exhaust' dyebaths with these two so all the modifications were done with the modifiers diluted in warm water rather than in the dye liquor. Using otherwise the same basic methods and modifiers I got these colours from Brazilwood:
The transformation from peachy oranges to purples with the ammonia was almost instant and really dramatic The tips of the fibres had as always taken up more dye and with ammonia they went bright red against magenta, with iron and ammonia they were almost navy blue against purple.
 Silk did not seem to dye as well as wool with brazilwood:


For each of the 'exhaust' baths I re-boiled the muslin bag of dyestuff in the original dye liquor for an hour or two, then left it to steep for at least 24 hours.

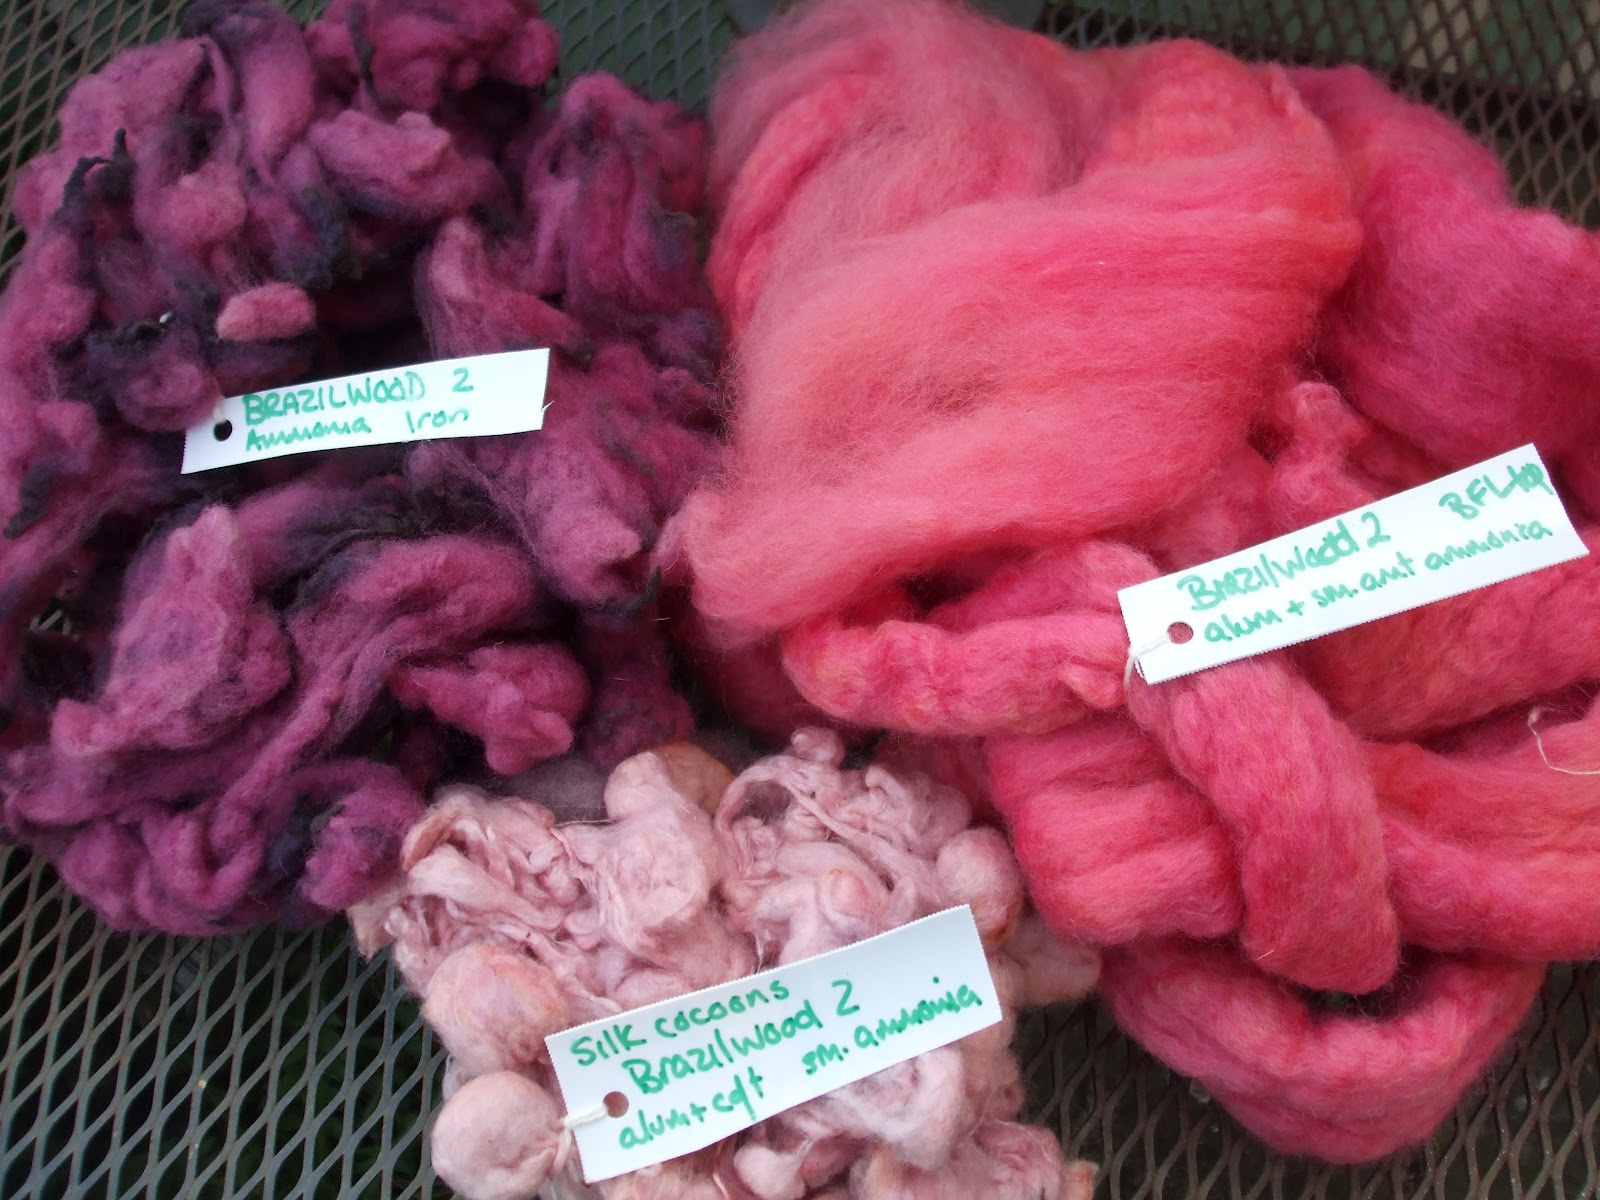
the second Brazilwood bath gave these:
Top right: BFL tops, bottom; silk cocoons, both modified with a small amount of ammonia
Top left: fine crossbred fleece, modified with iron and then ammonia

A third 'exhaust' on drum-carded wool modified with iron and ammonia gave this blue

Madder was next, on fibres mordanted with alum but no cream of tartar as this is supposed to give better colours. Using the same methods as brazilwood gave:
There is a bit of silk top attached to #26 - no modifier The silk has taken up the colour well in places but is quite patchy. I also dyed some yarn samples and silk  in this dye bath, which were also a bit uneven.

In the second madder dyebath I dyed two batts of carded wool  which came out a good strong slightly brickish red, very even. Then I transferred the dye to an old copper pan and dyed the third batch, more carded wool, in it. I left it to steep overnight without stirring after the heating phase, and the final shade of the batt was quite varied, as some parts were touching the copper and some were not.

The pan had been quite tarnished (i think it has been in my garden shed for about 15 years!!) but after the dyeing the parts under the water level were much brighter so ther had clearly been some kind of reaction.

Even though I had only started with 100g each of brazilwood and madder, there still seemed to be a lot of colour left after three dyebaths, so I transferred the liquor and bags of dyestuff to large jars, added alum and fibre, for solar dyeing. They will sit on my windowsill for several months but already the fibres look as if they have taken up plenty of colour. I also set up a solar jar with un-used madder, for comparison - it s the biggest one, on the right.

As if I didn't have enough different dyes and modifications to try out, I also experimented with soome dried Hibiscus flowers from Turkey
These were actually sold for making a drink, mixed with cloves and chunks of ginger root and cinnamon bark. I picked out most of the spices but the simmering dyepot, and even the dyed fibre, had a subtle spicy aroma! In the first dyebath I dyed 50g of cashmere yarn and 50g of silk hankies
Not the rich ruby red of the dye liquor, but a very pretty shade, quite pink in some lights but more beige in others. The second dyebath gave a paler more beige shade on silk. All were pre-mordanted with alum and cream of tartar. I tried modifying tiny samples with both ammonia and vinegar but both seemed to make the colour less pink.

All together I dyed 44 samples over three very enjoyable weeks. I will probably leave the yellow/green dyes for those who appreciate those colors more than I do, but the range of pinks, reds and purples that I got has whetted my appetite for more dyeing. I have sown a tray of japanese indigo seeds in my greenhouse so hopefully by the end of the summer I will have enough to attempt some blues!! In the meantime I will enjoy spinning with colour for the next few weeks....

Colourful Months part 1 - February

The late winter months can really seem long and dreary, even though February is really the shortest month and the days are starting to get longer - so its a good time to inject a little colour!!

However long you have been practicing a craft you can always learn from other people so along with other members of the Online Guild of Weavers, Spinners and Dyers, I joined in Alison Daykin's  online Colour Blending workshop.

here's the picture I took as my colour inspiration:
I was interested in the colours in the water, and the rock, so I called the series 'Water and Rock' (original, huh?!!)

The plan was to blend a series of colours from fibres in primary colours plus black and white:
The natural black and white are Shetland wool, the dyed colours are merino

I was aiming to create the dark greenish khaki of the shadows on the water, a couple of greyish blues, and the more golden shade on the rock. I started with the khaki:
 First I started to blend yellow and blue and a little black to try for green. way too much blue at first, I added small amounts of each colour at a time, weighing as I went along, and ended up with 5 parts blue, 5 parts yellow, 6 parts black and 2 parts red - after many passes through my drum carder I got the yellow to 'sink in':
  Next, an attempt to replicate the shade but adding the final proportions of colours all in one go gave me this:
It is very difficult to weigh small amounts accurately with normal domestic equipment, so they arent exactly the same, but pretty close.

On to the grey blue:
On the next-to-last pass through the drum carder I added a few tiny 'pinches' of white silk tops to give lustre and highlights, here's the final batt:
This one has 6 parts blue, 8 white, 5 black and 1 red. It is a bit bluer than I had hoped, so I tried again, starting by making grey (15 white, 8 black) and then adding some blue (3) and a little red (1). Again I added some white silk near the end of the carding :
The two dark khakis plus the greyish blue and the blueish grey seemed to reflect the main shades in the water:
Now for the rock! The natural black Shetland, really a very dark brown, would fit for the dark areas so I just had the golden brown to try to replicate. 8 parts yellow, 4 black and 2 red turned out to be a good guess and I didn't make any further additions:


So after a full-on afternoon of weighing and drum-carding I had seven batts. The proportions of shetland to merino varied, but they were a joy to spin as they were so thoroughly carded. I spun singles which when 2-plyed gave a double-knitting thickness, in total I spun 445 metres (145g).

The presence of the Shetland has given the yarn more bounce and loft than merino alone would have had. Now I'm working up a design to use all the colours together, with a sense of the picture without trying to replicate it - watch this space!!!

Fancy trying this yourself? On May 20th I'm running a workshop called Playing with Colour where you can choose between this and two other techniques to put colour into your spinning - or felt-making. The workshop will be in Blackford Village Hall, (Perthshire) from 10 - 4 and costs £70. All materials provided. Drop me an e-mail to deborah.gray7@btinternet.com if you'd like more details.


Sunday, 4 March 2012

Monday, 20 February 2012

Happy Spinning Sunday

A craft shop full of colourful hand-made goodies, yummy cake and a group of people all keen to learn how to spin - my ideal Sunday afternoon, and that just about sums up the little workshop at An Cnoc, 31 East High Street, Crieff yesterday.
My 'teaching'spindles have whorls made from mahogany, 'recycled' from the last wooden fire engine used at Ardrishaig on the West coast of Scotland. A little bit of history that has now introduced many people to spinning

An Cnoc is the name of the craft shop, a real treasue trove of beautiful and unusual items, many made locally. Mandy, the owner, hosts a knitting group and a crochet group there, and as several of the members were interested in learning to spin, Mandy asked me to do an introductory workshop on drop-spindle spinning. We were joined by two ladies visiting Crieff for the weekend who I think had only found out about the workshop when visiting the shop the day before - an unexpected extra in their weekend away.
Working with drum-carded fleece lets the learners spend all their time spinning - but they don't learn how to prepare it, and guess who spends hours carding wool before the workshop!

With some complete beginners and a couple of spinners who use spinning wheels but wanted to brush up their spindle technique, it was a friendly and chatty group who quickly got to grips with spindles and some fleece that I had drum carded beforehand. Plenty of laughter and a generous supply of tea and cake (thanks Mandy!!) lightened the intense concentration as the learning progressed. By the end of the three hour session everyone had a skein of two-ply yarn that they had spun themself. I'm looking forward to seeing photos of the yarn after it has been washed - and to keeping in touch with this group.

Friday, 27 January 2012

First confirmed workshops for 2012 - and a special Fleece day in June

Here are the details for the first few workshops I have confirmed for 2012:

(for more details or to book a place please e-mail me - deborah.gray7@btinternet.com )
For a discount on workshops, look at the Special Offer with the Fleece On the Hoof Day

March 17th (Saturday) 1 - 4pm    Drop-spindle spinning      £36
Elena Costella's Yarn and Fibre Studio, Bridgend, Perth
Just what it says on the tin, 3 hours of drop-spindle spinning. Suitable for beginners or improvers. I will provide spindles and prepared fibre.


April 21st (Saturday) 10 - 4pm Fibre preparation and Drop-spindle spinning  £70
Blackford Village Hall, Perthshire (just off the A9 halfway between Stirling and Perth)
Starting with a whole fleece, we will learn how to sort the wool, recognising the different qualities of fibre. We will then cover hand carding and combing, and learn the difference between woollen and worsted yarns. We will also look at other fibres that are available to handspinners. After a short break for lunch (not included) we will spend the afternoon using drop spindles to spin and then ply. Suitable for beginners or improvers. All equipment and materials provided.

April 22nd (Sunday) 10 - 4 Spinning with spinning wheels   £70
Blackford Village Hall, Perthshire (just off the A9 halfway between Stirling and Perth)
This workshop is ideal for those who want to transfer their drop-spindle skills to a spinning wheel or who just want to improve their spinning wheel skills. We will spin singles yarns, and then learn why and how to ply the yarn, and how to 'finish' it. There will be a short break for lunch (not provided). Equipment and materials provided - £10 discount if you bring your own spinning wheel.

May 19th (Saturday) 10 - 4  Spin control       £70
Blackford Village Hall, Perthshire (just off the A9 halfway between Stirling and Perth)
This workshop is for people who have some experience of spinning, whether with drop spindle or spinning wheel. We will spin a variety of yarns, learning how to control thickness and twist to produce a balanced 2-ply yarn suitable for whatever project you have in mind. We will also explore some more unusual plying techniques that give different effects. There will be a short break for lunch (not provided). Equipment and materials provided - £10 discount if you bring your own spinning wheel.

May 20th (Sunday) 10 - 4  Playing with colour   £80
Blackford Village Hall, Perthshire (just off the A9 halfway between Stirling and Perth)
In this workshop we will be exploring different ways of blending colours - and fibres - to bring even more richness to handspun yarns. Subtle blends, colour gradients or wild and vibrant mixes - its up to you!! Please bring one or two shoe boxes (or similar) to take away your blended fibres. I will bring some drop-spindles in case you just can't wait to spin your blends, but if you want to use a spinning wheel please bring your own. There will be a short break for lunch (not provided). Equipment and materials provided - £10 discount if you bring your own drum carder.

May 26th & 27th   The Wool School, Miagliano, Italy
Content of this weekend will be developed according to the wishes of the participants; there will probably be one day for beginners and one for improvers. Contact me for more details

I'm still hoping to confirm dates for Grantown-on-Spey and County Wicklow, Ireland - watch this space

10th June (Sunday)                            Fleece on the Hoof       £10
Culdees Farm, Muthill, Perthshire
a great chance to select your fleece ‘on the hoof’, learn about how it was produced and then spin completely traceable local wool
After an informal (an optional) morning spin-together and bring-your-own picnic lunch we will have the opportunity to choose our fleeces - while they are still on the sheep!!
The Culdees flock are Texel cross sheep, they have a good medium staple length wool, fine springy fibres and little or no kemp. There is a significant proportion of Blue-Faced Leicester in the breeding and some of the fleeces definitely take after their grandad, having the long, fine, ringleted staples of BFL.
.  The young sheep with the best wool (nearly all white gimmers this year) will be gathered for us to choose from. Each sheep has an ear tag with a number, and when you have chosen your fleece, the tag number will be noted beside your name. The sheep will be shorn over the next few days and when you return to collect your fleece it will be labeled with your name. If necessary we can arrange to post fleeces but this will incur an extra charge.
Your £10 payment includes your first fleece; once everone has chosen a fleece if there are any left you can choose more for £7 each.
NB all proceeds from this event will go to the farmer, but places should be booked through me. PLACES ARE LIMITED SO PLEASE BOOK EARLY - YOUR PLACE WILL BE CONFIRMED ONCE YOU HAVE PAID

Special Offer!! if you hold on to half of your Fleece on the Hoof ticket, you can claim a £10 discount off the cost of one of my spinning workshops or a 3 hour session of 1-1 tuition (this offer is valid between 1st March and 31st August 2012 but excludes the workshop at Elena Costella) – and that is the cost of your fleece!